


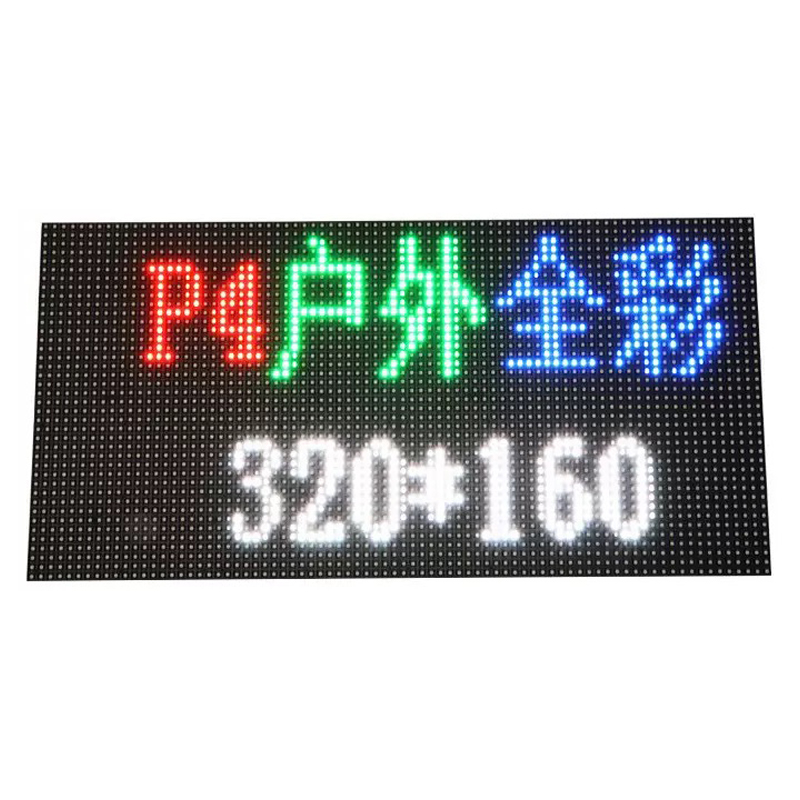
Outdoor P4 LED Display Module
For custom orders and bulk discounts, contact our sales team
$14.50
I. Preparations Before Installation
1. Site Evaluation and Planning
Structural Assessment: Check the load-bearing capacity of the installation location (e.g., walls, columns, steel structures) to ensure it can support the total weight of the display screen (each module ≤1.5kg; calculate total weight for full screen).
Environmental Inspection: Confirm that the installation area is free from strong electromagnetic interference, flammable or explosive materials, and avoid areas with frequent lightning strikes.
Dimension Measurement: Accurately measure the dimensions of the wall or frame according to design drawings or customer requirements, leaving space for debugging.
2. Materials and Tools Preparation
Hardware Materials:
Outdoor P4 LED module (320mm × 160mm)
Steel structure frame (anti-rust treated, load capacity ≥1.5 times the screen weight)
HUB75 connection cables, power cables (5V DC, wire diameter ≥1.5mm²)
Control system (DVI/HDMI main control card, receiver card)
Waterproof glue, sealant, drainage hole accessories
Tool List:
Drill, level, screwdriver, multimeter
Waterproof testing tools (spray test equipment)
High-altitude work equipment (crane, scaffolding)
3. Personnel Training and Division of Labor
Ensure that installation personnel are familiar with product technical parameters and safety regulations, with clear division of labor (structure installation team, circuit debugging team, waterproofing team).
II. Detailed Installation Steps
1. Steel Structure Frame Construction
Frame Installation:
Weld or fix the steel structure frame according to the design drawings, ensuring horizontal error ≤3mm/m².
Use hot-dip galvanized steel, coated with anti-rust paint, and apply anti-corrosion treatment at welding points.
Grounding and Lightning Protection:
Install lightning rods or lightning belts to ensure grounding resistance ≤3Ω between the display screen and building.
Add surge protection devices (SPD) at the power input end to prevent damage from lightning strikes.
2. LED Module Assembly and Fixation
Module Installation:
Insert modules into the frame in rows and columns, adjust gap between modules <1mm, and use a level to calibrate overall flatness.
Connect modules via HUB75 interface, ensuring signal lines are securely plugged in to avoid poor connections.
Power Connection:
Each module connects to an independent power source (5V DC ±5%), when wiring in parallel, group wiring to avoid excessive voltage drop.
Keep power lines and signal lines at least 50mm apart to reduce electromagnetic interference.
3. Control System and Signal Debugging
Signal Input:
Connect the main control card (DVI/HDMI) to the receiver card using fiber optic or Ethernet cable; for transmission distances >100m, single-mode fiber is recommended.
Before debugging, turn off the power and check if all connections are secure to avoid short circuits.
Picture Testing:
After powering on, sequentially test red, green, blue, white colors to check for dead pixels (<0.0002‰) or color bias.
Adjust brightness to 3500–6500 cd/m², ensuring automatic dimming functions properly.
4. Drainage Design
Reserve drainage holes (diameter ≥10mm) at the bottom of the screen to ensure rapid water discharge.
For embedded installations, add a waterproof layer (e.g., silicone sealant strips) between the building and the screen.
5. Ventilation and Cooling System
Cooling Design:
Install axial fans (airflow ≥1000m³/h) above the back of the screen to maintain internal temperatures ≤45°C.
Fan power supply should be independently configured to avoid conflicts with the main power supply.
OR: Install an air conditioner inside the screen cabinet; one 2P AC unit can control temperature for up to 20㎡.
III. Installation Considerations
Safety Regulations
Wear safety harnesses during high-altitude operations, and ensure scaffolding has passed safety inspections before use.
Before power-off operations, confirm all equipment is turned off to avoid electric shock risks.
Environmental Adaptability
Achieve IP65 waterproof rating, conduct spray tests after installation (no water infiltration within 30 minutes).
In high-temperature (>60°C) or low-temperature (<-20°C) environments, additional heaters or cooling fans may be required.
Circuit Protection
Install overvoltage/overcurrent protection modules (OVP/OCP) at the power input end to prevent voltage fluctuations from damaging equipment.
IV. Common Issues and Solutions
Issue | Possible Cause | Solution |
|---|---|---|
Partial black screen | Poor contact or broken power line | Check power line connections, replace damaged cables |
Color inconsistency (ΔE>2.5) | Non-uniform color uniformity | Replace modules with color deviation |
High temperature alarm (>45°C) | Cooling system not activated or blocked | Clean fan filters, check ventilation channels |
Damage by lightning | Incorrect installation of lightning protection | Reconfigure lightning rods and SPD, ensure grounding resistance ≤3Ω |
Dead pixel rate >0.0002‰ | Damaged during transportation or installation | Inspect module appearance, replace damaged units |
V. Maintenance and Care Recommendations
Daily Maintenance
Clean surface dust regularly (using soft cloth + alcohol), avoiding dust accumulation affecting heat dissipation.
Check and clean drainage holes periodically to prevent blockages.
Annual Inspection
Test brightness uniformity (≥95%) and color consistency (ΔE≤2.5) across all modules.
Inspect rust conditions of the frame; reapply anti-rust paint if necessary.
Pre-Rainy Season Check
Conduct waterproof performance checks before the rainy season to ensure IP65 standards are met.
Category | Parameter | Value |
|---|---|---|
Physical Features | Module Dimensions | 320mm (Width) × 160mm (Height) |
Pixel Pitch | 4mm | |
Pixel Density | 62,500 dots/㎡ | |
Pixel Composition | 1R1G1B (Full Color) | |
Module Weight | 1.5kg | |
Display Performance | Resolution | 80 (Width) × 40 (Height) = 3,200 pixels |
Viewing Angle | Horizontal 140°–160°, Vertical 120°–130° | |
Optimal Viewing Distance | ≥4m–5m | |
Brightness | ≥5,000–6,500 cd/m² (White Balance), Software Adjustable (0–100 Levels) | |
Color Temperature | 2,000K–9,500K Adjustable | |
Contrast Ratio | ≥3,000:1–6,000:1 | |
Color Capability | Supports 16.7M Colors (Full Color), 64K (Dual Color), 256 Levels (Monochrome) | |
Uniformity | Brightness Uniformity ≥95%, Color Consistency ΔE ≤2.5 | |
Gray Scale | 14bit–16bit (16,384 Levels) | |
Electrical Specifications | Operating Voltage | AC 200–240V ±5%, 50Hz |
Average Power Consumption | 200–400W/㎡ (Varies by Driving Mode and Brightness) | |
Peak Power Consumption | 600–800W/㎡ | |
Driving Method | 1/8–1/16 Scan (Constant Current Driving) | |
Refresh Rate | ≥1,920Hz–3,840Hz (Higher Rates Supported in Some Models) | |
Frame Rate | ≥60Hz | |
Control System | Control Method | Synchronous Control (DVI/HDMI Main Control Card + Receiving Card) |
Transmission Method | Cat5e/6 Ethernet Cable (Up to 100m without Repeater), Fiber Optic (Single-mode 20km, Multi-mode 500m) | |
Control System Brands | Linsn, Colorlight, NovaStar, Mapu Guangcai | |
Software Features | Supports Brightness/Color Calibration, Image Scaling, Video Playback (2K/4K/8K), Auto Dimming | |
Environmental Adaptability | Operating Temperature | -20°C–+50°C (Some Models Support -10°C–+60°C) |
Protection Rating | IP65 (Waterproof & Dustproof) | |
Wind Pressure Resistance | ≤1,200Pa (Meets Outdoor Installation Requirements) | |
Installation & Maintenance | Installation Methods | Floor-standing, Wall-mounted, Suspended, Recessed |
Maintenance Method | Front/Back Maintenance (Some Models Support) | |
Waterproof Design | Double Sealing (Module Cover + Cabinet Waterproof Layer), Drainage Holes | |
Cooling System | Axial Fan (≥1,000m³/h) or Built-in Air Conditioner (2P AC for 20㎡) | |
Reliability & Lifespan | Mean Time Between Failures (MTBF) | ≥5,000–10,000 Hours |
Theoretical Lifespan | 100,000 Hours (~11 Years) | |
Pixel Failure Rate | <0.0002‰ (Dead Pixel Rate) | |
Light Attenuation (3 Years) | ≤15% |
Notes
Module Compatibility: Supports various cabinet (e.g., 960×960mm, 640×960mm) for different application scenarios.
Extended Functions:
Remote monitoring and fault diagnosis support.
Lightning protection (Grounding resistance ≤3Ω, SPD module).
Environmental certifications (e.g., CQC Energy-saving Certification CQC2270133061).
Applications: Outdoor advertising, sports stadiums, stage performances, traffic guidance, smart cities, etc.